I can't for the life of me seem to figure out how to make trees, arcs, cones or cylinders with BZEdit 1.6.5
Am I missing something out, or is it impossible to make them with BZEdit 1.6.5?
If it is at all possible to make them, please can somebody give me a detailed walkthrough on how i can make them, because i would like to add some of them to my "Kirby's Slaughter Houses" map (which is still in Beta Testing stage atm). Any help (and i really do mean ANY) that is useful is greatly appriciated!
Making Trees
-
Lt-Kirby2007
- Private First Class

- Posts: 76
- Joined: Tue May 15, 2007 7:53 pm
- Location: England, Uk
Making Trees


BZTANK.NET ADMIN - THE PLACE TO BE!!!!
-
Longhair
- Private First Class
- Posts: 330
- Joined: Tue Feb 08, 2005 6:06 pm
- Location: Lancaster, PA
- Contact:
Not to bash bzedit, because it does what it was built for at the time, but it's pretty much useless for making anything beyond squares and pyramids.
Hate to tell you, but you're going to need to download Blender or Wings and learn their user interfaces. Once you get over that learning curve, you have to learn how to get your models into bzflag.
Do some searching in the mapmaking forums. I believe that there is another, separate forum that will have information too. Is that still up? Anyway, be prepared to do a TON of research and spend a TON of time learning how to do it. There is no simple answer.


With the release of BZWB this summer, we will finally have a "real" editor.
BZWB (BZFlag Workbench), the editor will support most, if not all 2.0 mapping parameters.
http://my.bzflag.org/bb/viewtopic.php?t=10820
Official Dev Blog:
www.bzworkbench.wordpress.com
BZWB (BZFlag Workbench), the editor will support most, if not all 2.0 mapping parameters.
http://my.bzflag.org/bb/viewtopic.php?t=10820
Official Dev Blog:
www.bzworkbench.wordpress.com

You can make really simple looking trees without Blender by using boxes and pyramids.
Code: Select all
box
  name stump
  position 0 0 0
  size 0.5 0.5 13
  rotation 0
end

pyramid
  name leaves
  position 0 0 8
  size 4 4 8
  rotation 0
end

pyramid
  name leaves2
  position 0 0 11
  size 4 4 8
  rotation 45
end

pyramid
  name leaves3
  position 0 0 14
  size 4 4 8
  rotation 22
end
-
Lt-Kirby2007
- Private First Class
- Posts: 76
- Joined: Tue May 15, 2007 7:53 pm
- Location: England, Uk
-
Spazzy McGee

- Sergeant Major

- Posts: 1405
- Joined: Mon Mar 21, 2005 4:59 pm
- Location: Planet MoFo, Sheffield Division; United Kingdom
Trees made out of boxes and pyrs suck.
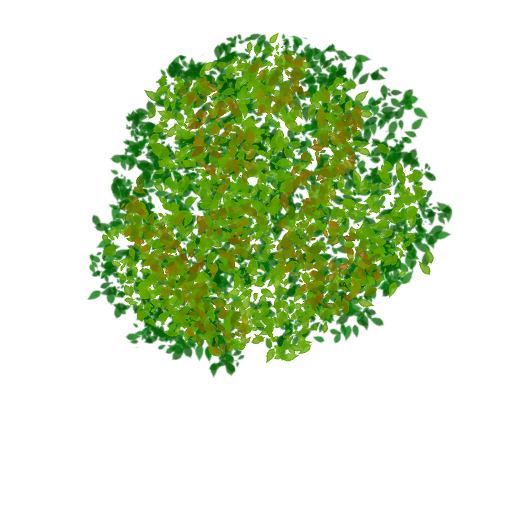
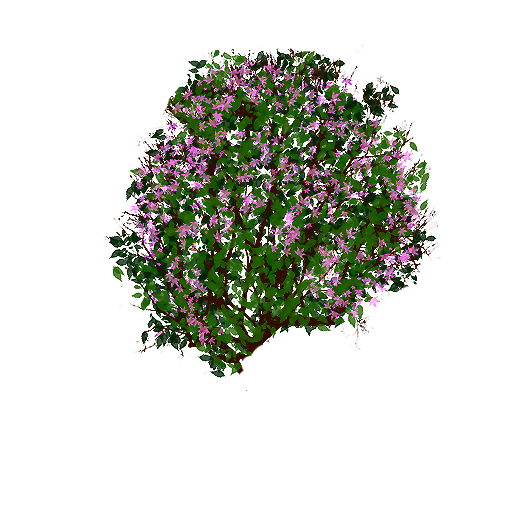
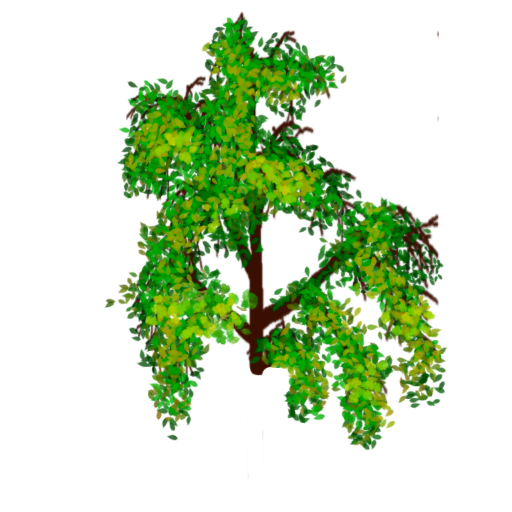
What you want to do is have a cone as the trunk, and then use several double-faced mesh plains for the leaves (with a leaf texture). That's pretty much what louman does. It's easy to do, and low-poly.
You end up with something that looks like this.

I've made a few textures for this sort of thing in the past. Feel free to use them.
http://images.bzflag.org/gbratley/Spazz ... _tree1.png
http://images.bzflag.org/gbratley/Spazz ... _tree2.png
http://images.bzflag.org/gbratley/Spazz ... _tree3.png
"Life is what happens to you while you're busy making other plans." - John Lennon
-
Lt-Kirby2007
- Private First Class
- Posts: 76
- Joined: Tue May 15, 2007 7:53 pm
- Location: England, Uk
Seriously dude, did you read what longhair said?
http://my.bzflag.org/w/Cone
Some BZEdit Info:
http://mybzflag.net/?p=23
Just use the "cone" object.Longhair wrote:useless for making anything beyond squares and pyramids.
http://my.bzflag.org/w/Cone
Some BZEdit Info:
http://mybzflag.net/?p=23
all of these things you want to add, it's ture can NOT be done in bzedit.
people mentioned blender or wings3d. these are great apps but they are VERY difficult to learn! may i suggest doing what i do. code things by hand. i think it's kinda fun although it may not sound to fun haha. it isn't as easy as bzedit but in my opinion is much easier than learning blender or wings3d.
what you can do is create something in bzedit. save it. go to that file right click on it and open it with notepad. it should have what you created in code. that is where you can add any objects you can possably emagine.
this may end up being a very long post but i hope it is helpful and doesn't talk in circles.
i'm going to explain this to you wether you need it or not, you probably already know how but just going to make sure i'll explain very briefly how to write in "code"
if you have created lets say a box in bzedit and opened the file in notepad you will see maybe #created in bzedit (date and all that) well any thing after a # sign the computer will ignore. you can put notes using the # this will prove to be helpful in some cases!! you will also notice it will look something like this
world
size 400
end
options
+r
-j
-set _tankSpeed 25
-ms 5
-mp 0,2,0,2,0,2
end
box
name box1
position 0 0 0
size 10 10 10
rotation 0
end
the fist thing you may notice is that every thing is called. such as world. or options, or box. you must write that down to let the computer know what you are about to create. as well as after every object there is an end command. this must be used. also CHECK SPELLING! the most stupid spelling mistake will keep the server from launching.
all the options and what not... well there are bazillians of options that i won't explain here but i'll give you a link.
http://my.bzflag.org/w/Server_Variables
put those in the options setting with "-set " in front of it. you can also make those changes as an admin by using /set _variable
so the website that was linked above by Winny to the code for the cone works like a box. you must say you are creating a cone. i'll explain most of the complex shapes later in the post.
http://my.bzflag.org/w/:Map_Making is the page before what was linked above by Winny. this shows the spheres and arcs and all that. BUT...
incase that webpage confuses you, (because i know it confused me) i'll let you know the only real things you need to make a cone is divisions, position, and size. Divisions basically make the cone more smooth. the higher the divisions the more smooth. for example if you were to say 4 divisions it would look like a pyramid. basically the divisions is how many sides there are. 4 divisions 4 sides. imagine 128 divisions. the sides would be so small you wouldn't really notice them making it look more like a cone. to see what i'm talking about go ahead and test it out. i'll show the code in a second. position i assume you know what position is. size i assume you know what that is too, how ever you should know that you can make a cone that's more of a oval cone simply by making the size something like 5 10 20. if the x is larger than the y coordanat or vise versa than obviousy you have an oval, just like in a box you would have a rectangle. and that's it.
cone
name cone1 <name is optional
divisions 128
position 0 0 0
size 10 10 20
end
there are other options such as shift shear scale spin angle smoothbounce and flatshading and probably many more. those options i'm not sure what they do. in fact i have a post asking about those up right now. how ever i do know how to use the other options such as rotation(i'm sure you know what that does too ) which in a cones case doesn't matter really what way it's rotated, angle, which basically allows you to make maybe half of a cone. if you say angle 180. that would make half a cone. angle 90 would make 1/4th of a cone and so on. to add one of these simply type in angle <number> somewhere under "cone" i also know how to use phydrv and matref. i'll show you how to use those later in the post (if you don't already know how to use them). for now lets move on to arcs
an arc...
an arc is basically a cylinder. however it doens't have to be a perfect cylinder depending on certain options you select. for an arc the only required options are divisions position and size. just like the cone divisions have the same effect, position and size are all the same. once again you can have an oval shaped cylender type thing. now, you WILL find more options to an arc than to a cone, for example the ratio option. the ratio options lets you basically put a hole in the cylender. so if you have the option: ratio 1 you would have a full cylinder. if you say for example ratio .3 or any number less than 1 you will get a whole in the cylender. the bigger the number the smaller the whole. angle once again allows you to do a simi-circle. rotation once again isn't really needed. phydrv and matref once again i'll show later. let move to the sphere
the sphere...
the only options required to make a sphere are position, size, divisions.
once again all these options do the same thing. also once again you may have an oval like sphere. you make an oval like sphere simply by making the x and y's different sizes just like in the cone and arc. the radius option is just a substitute for size. you can write size 10 10 10 or radius 10 both do the same thing. however if you want an oval shaped sphere you have to use size. rotation once again doesn't really have an effect and :O i can show you how to use phydrv and marref now. (am i saying "once again" too much )
ok a phydrv is a physics driver. and a matref, well i'm not sure what it means, but i always thought it as material reference. lets focus on material right now. a material is how you add a design or a texture on something. for example if you make a box that box doens't have to have bricks around the outside of it like it does in bzedit. you want to make a tree? later i will show you how to make a cone and put a material on it like louman does although louman is way better than i am!!. you might want to find a picture of wood on google or something and use it as a material so that instead of a cone with bricks it looks like wood. i'll show you how to do this later. you can change that design by using the material and matref. these two work together. material is where you define the material. and matref is where you reference the material you defined. let me show you...
material
name mat1
addtexture blue_bolt.png
end
meshbox
position 0 0 0
size 10 10 10
rotation 0
matref mat1
end
material is letting the computer know that a material is about to be explained to it. you name it that way you can reference it with the matref. the name can be any thing you want as long as it does not have any spaces. you type in addtexture and you state a texture name. now how do you know what texture names there are? i have a mac so i can say how to get there for any one that may read this post later, looking for the same help that may use a mac. however this won't apply to you as a PC user. (i assume you have a PC because you are using bzedit not ibzedit) but this might help a little. maybe someone else with a PC could explain the path better.
if you control click (right click) on the bzflag icon and click show package contents and click on contents and click on resorces those are the pictures you may use.
the path will be different on a PC i don't know what it is. what you will find are images that are used in every day games. the top of a base, the wall of a base. a bullet which is blue_bolt.png (i used above) you can check the rest out by going to that folder. you can also add your own. any picture you add must be in a .png format. i suggest just taking a sreen shot of a picture you want to use. such as the wood picture. most screen shots are .png formats. (at least mine are) you can name that what ever you want as long as it has a .png in the title and no spaces. then put it in the same folder as the rest of the images in the resorce folder. you may now reference those images by typing matref (name of image.png)
also you probably noticed i typed meshbox, not box. To enable the material it must be a meshbox. a meshbox is a box just like a "box" however it enables things such as materials and physics. the same goes for pyramids. you must type meshpyr to get a pryamid with a material on it or phisics. however objects such as spheres cones and arcs don't need do have the word mesh in front of them.
also a really cool thing is diffuse. you can add the diffuse command and it will look like this diffuse 1 1 1 1. those four number represent things. the fisrt number is the amound of red that will be in the meshobject. the second number is the amount of green, the third is the amount of blue. so you can mix those color to make more colors. you may use a range from 0-1. for example diffuse .3 .5 .26 1. now the fourth number is cool. it is the opacity or transparency. the see through-ability i call it 0 is invisible .5 is half invisible 1 is normal. if you use this i suggest using the texture mesh. so it would look like (for default images you don't have to say .png but i suggest getting in the habbit of doing it.)
material
name mat1
diffuse .5 .25 .1 .6
addtexture mesh.png
end
so the best way of thinking about a material or rather a meshbox with a material is NOT this. a mateial isn't something you put on as a skin to a box. a meshbox is a different type of box that alows a material. so lets cap up materials
material <you must type material
name mat1 <you must give it a name so that you can reference it, the name may be any thing as long as there are no spaces. i named it mat1
addtexture <add a texture name you may find in the folder i specified simply by typing the file name of that image.
end <must use end
meshbox <this alows for a box to use the material above
position x y z
size x y z
rotation 0
matref mat1<referencing the material to the name mat1 so that this box will have the properties of the material specified.
end <must use end
similarly, lets make a mesh pyramid (a pyramid with different images on it)
meshpry <this alows for a pyramid to use the material above
position x y z
size x y z
rotation 0
matref mat1 <referencing the material to the name mat1 (note, i can have several material listed above with different names and reference them as i want with different objects
end <must use end
and the same for a arc, cone and sphere, this time without the mesh in front of the name
sphere
divisions 128
position
size
rotation
matref mat1
end
done with materials? if you have any questions go ahead and ask (and don't be afraid to sound stupid you are just learning this stuff and so am i so i sound stupid sometimes... most of the time don't worry about asking newbie questions. they are good questions.
lets move on to phydrv and physics
physics make your tank behave in different ways. if you have ever played laser mania by louman than you know on the outskirts of the map there is something you can jump on and you go really fast, that is a physics. physics and materials work the same way. physics is to material as phydrv is to matref. you must specify a physics then on a meshbox, meshpyr cone arc sphere or whatever, you can reference that physics by using the phydrv command just like you would use the matref command for materials. there are different physics commands. linear, angular, slide and death. in the louman map i mentioned above is a linear physics. linear physics makes your tank move in... well a line. the numbers after a linear command are just like position x y z. example
physics
name phy1
linear 50 0 0
end
this will make your tank move at a speed of 50 in a positive x direction
physics
name phy2
linear 0 50 0
end
this will make your tank move at a speed of 50 in a positive y direction
physics
name phy3
linear 0 0 50
end
this will make your tank jump at a speed of 50
physics
name phy4
slide 5 0
end
this will make your tank basically feel like it's on ice, that's the only way i can explain it. which ever way the tank is moving it will keep moving that way. a good example is in ... i forgot the exact title, but it's the "wide world even wider" on the sides if you go up top there is a slide physics.
physics
name phy5
death haha! you died
end
this will make the tank die when it touches the object that refers to this and the message haha! you died will be displayed to that person.
now you know how to write a physics you have to be able to refrence it.
let me show you the code
physics
name phy1
death i like you better dead!
end
meshbox
position 0 0 0
size 10 10 10
rotation 0
phydrv phy1 <or what ever you named the physics
end
this works just like the material
the thing about physics and materials is that they have to be writen before they are referenced.
this WON'T work
meshbox
position 0 0 0
size 10 10 10
rotation 0
matref mat1
end
material
name mat1
addtexture blue_team.png
end
i hope this helped. as you get more advanced into making maps by hand you will start doing meshes and "tetra" which is a tetrahedron. <i think that's how you spell it. i'm willing to explain meshes but it's much more coplicated and would be easier to explain on IM.
if you have any more questions my email is dirtbikerdude_91@yahoo.com
i'm happy to answer any questions that i am capable of answering.
people mentioned blender or wings3d. these are great apps but they are VERY difficult to learn! may i suggest doing what i do. code things by hand. i think it's kinda fun although it may not sound to fun haha. it isn't as easy as bzedit but in my opinion is much easier than learning blender or wings3d.
what you can do is create something in bzedit. save it. go to that file right click on it and open it with notepad. it should have what you created in code. that is where you can add any objects you can possably emagine.
this may end up being a very long post but i hope it is helpful and doesn't talk in circles.
i'm going to explain this to you wether you need it or not, you probably already know how but just going to make sure i'll explain very briefly how to write in "code"
if you have created lets say a box in bzedit and opened the file in notepad you will see maybe #created in bzedit (date and all that) well any thing after a # sign the computer will ignore. you can put notes using the # this will prove to be helpful in some cases!! you will also notice it will look something like this
world
size 400
end
options
+r
-j
-set _tankSpeed 25
-ms 5
-mp 0,2,0,2,0,2
end
box
name box1
position 0 0 0
size 10 10 10
rotation 0
end
the fist thing you may notice is that every thing is called. such as world. or options, or box. you must write that down to let the computer know what you are about to create. as well as after every object there is an end command. this must be used. also CHECK SPELLING! the most stupid spelling mistake will keep the server from launching.
all the options and what not... well there are bazillians of options that i won't explain here but i'll give you a link.
http://my.bzflag.org/w/Server_Variables
put those in the options setting with "-set " in front of it. you can also make those changes as an admin by using /set _variable
so the website that was linked above by Winny to the code for the cone works like a box. you must say you are creating a cone. i'll explain most of the complex shapes later in the post.
http://my.bzflag.org/w/:Map_Making is the page before what was linked above by Winny. this shows the spheres and arcs and all that. BUT...
incase that webpage confuses you, (because i know it confused me) i'll let you know the only real things you need to make a cone is divisions, position, and size. Divisions basically make the cone more smooth. the higher the divisions the more smooth. for example if you were to say 4 divisions it would look like a pyramid. basically the divisions is how many sides there are. 4 divisions 4 sides. imagine 128 divisions. the sides would be so small you wouldn't really notice them making it look more like a cone. to see what i'm talking about go ahead and test it out. i'll show the code in a second. position i assume you know what position is. size i assume you know what that is too, how ever you should know that you can make a cone that's more of a oval cone simply by making the size something like 5 10 20. if the x is larger than the y coordanat or vise versa than obviousy you have an oval, just like in a box you would have a rectangle. and that's it.
cone
name cone1 <name is optional
divisions 128
position 0 0 0
size 10 10 20
end
there are other options such as shift shear scale spin angle smoothbounce and flatshading and probably many more. those options i'm not sure what they do. in fact i have a post asking about those up right now. how ever i do know how to use the other options such as rotation(i'm sure you know what that does too
an arc...
an arc is basically a cylinder. however it doens't have to be a perfect cylinder depending on certain options you select. for an arc the only required options are divisions position and size. just like the cone divisions have the same effect, position and size are all the same. once again you can have an oval shaped cylender type thing. now, you WILL find more options to an arc than to a cone, for example the ratio option. the ratio options lets you basically put a hole in the cylender. so if you have the option: ratio 1 you would have a full cylinder. if you say for example ratio .3 or any number less than 1 you will get a whole in the cylender. the bigger the number the smaller the whole. angle once again allows you to do a simi-circle. rotation once again isn't really needed. phydrv and matref once again i'll show later. let move to the sphere
the sphere...
the only options required to make a sphere are position, size, divisions.
once again all these options do the same thing. also once again you may have an oval like sphere. you make an oval like sphere simply by making the x and y's different sizes just like in the cone and arc. the radius option is just a substitute for size. you can write size 10 10 10 or radius 10 both do the same thing. however if you want an oval shaped sphere you have to use size. rotation once again doesn't really have an effect and :O i can show you how to use phydrv and marref now. (am i saying "once again" too much
ok a phydrv is a physics driver. and a matref, well i'm not sure what it means, but i always thought it as material reference. lets focus on material right now. a material is how you add a design or a texture on something. for example if you make a box that box doens't have to have bricks around the outside of it like it does in bzedit. you want to make a tree? later i will show you how to make a cone and put a material on it like louman does although louman is way better than i am!!
material
name mat1
addtexture blue_bolt.png
end
meshbox
position 0 0 0
size 10 10 10
rotation 0
matref mat1
end
material is letting the computer know that a material is about to be explained to it. you name it that way you can reference it with the matref. the name can be any thing you want as long as it does not have any spaces. you type in addtexture and you state a texture name. now how do you know what texture names there are? i have a mac so i can say how to get there for any one that may read this post later, looking for the same help that may use a mac. however this won't apply to you as a PC user. (i assume you have a PC because you are using bzedit not ibzedit
if you control click (right click) on the bzflag icon and click show package contents and click on contents and click on resorces those are the pictures you may use.
the path will be different on a PC i don't know what it is. what you will find are images that are used in every day games. the top of a base, the wall of a base. a bullet which is blue_bolt.png (i used above) you can check the rest out by going to that folder. you can also add your own. any picture you add must be in a .png format. i suggest just taking a sreen shot of a picture you want to use. such as the wood picture. most screen shots are .png formats. (at least mine are) you can name that what ever you want as long as it has a .png in the title and no spaces. then put it in the same folder as the rest of the images in the resorce folder. you may now reference those images by typing matref (name of image.png)
also you probably noticed i typed meshbox, not box. To enable the material it must be a meshbox. a meshbox is a box just like a "box" however it enables things such as materials and physics. the same goes for pyramids. you must type meshpyr to get a pryamid with a material on it or phisics. however objects such as spheres cones and arcs don't need do have the word mesh in front of them.
also a really cool thing is diffuse. you can add the diffuse command and it will look like this diffuse 1 1 1 1. those four number represent things. the fisrt number is the amound of red that will be in the meshobject. the second number is the amount of green, the third is the amount of blue. so you can mix those color to make more colors. you may use a range from 0-1. for example diffuse .3 .5 .26 1. now the fourth number is cool. it is the opacity or transparency. the see through-ability i call it
material
name mat1
diffuse .5 .25 .1 .6
addtexture mesh.png
end
so the best way of thinking about a material or rather a meshbox with a material is NOT this. a mateial isn't something you put on as a skin to a box. a meshbox is a different type of box that alows a material. so lets cap up materials
material <you must type material
name mat1 <you must give it a name so that you can reference it, the name may be any thing as long as there are no spaces. i named it mat1
addtexture <add a texture name you may find in the folder i specified simply by typing the file name of that image.
end <must use end
meshbox <this alows for a box to use the material above
position x y z
size x y z
rotation 0
matref mat1<referencing the material to the name mat1 so that this box will have the properties of the material specified.
end <must use end
similarly, lets make a mesh pyramid (a pyramid with different images on it)
meshpry <this alows for a pyramid to use the material above
position x y z
size x y z
rotation 0
matref mat1 <referencing the material to the name mat1 (note, i can have several material listed above with different names and reference them as i want with different objects
end <must use end
and the same for a arc, cone and sphere, this time without the mesh in front of the name
sphere
divisions 128
position
size
rotation
matref mat1
end
done with materials? if you have any questions go ahead and ask (and don't be afraid to sound stupid
lets move on to phydrv and physics
physics make your tank behave in different ways. if you have ever played laser mania by louman than you know on the outskirts of the map there is something you can jump on and you go really fast, that is a physics. physics and materials work the same way. physics is to material as phydrv is to matref. you must specify a physics then on a meshbox, meshpyr cone arc sphere or whatever, you can reference that physics by using the phydrv command just like you would use the matref command for materials. there are different physics commands. linear, angular, slide and death. in the louman map i mentioned above is a linear physics. linear physics makes your tank move in... well a line. the numbers after a linear command are just like position x y z. example
physics
name phy1
linear 50 0 0
end
this will make your tank move at a speed of 50 in a positive x direction
physics
name phy2
linear 0 50 0
end
this will make your tank move at a speed of 50 in a positive y direction
physics
name phy3
linear 0 0 50
end
this will make your tank jump at a speed of 50
physics
name phy4
slide 5 0
end
this will make your tank basically feel like it's on ice, that's the only way i can explain it. which ever way the tank is moving it will keep moving that way. a good example is in ... i forgot the exact title, but it's the "wide world even wider" on the sides if you go up top there is a slide physics.
physics
name phy5
death haha! you died
end
this will make the tank die when it touches the object that refers to this and the message haha! you died will be displayed to that person.
now you know how to write a physics you have to be able to refrence it.
let me show you the code
physics
name phy1
death i like you better dead!
end
meshbox
position 0 0 0
size 10 10 10
rotation 0
phydrv phy1 <or what ever you named the physics
end
this works just like the material
the thing about physics and materials is that they have to be writen before they are referenced.
this WON'T work
meshbox
position 0 0 0
size 10 10 10
rotation 0
matref mat1
end
material
name mat1
addtexture blue_team.png
end
i hope this helped. as you get more advanced into making maps by hand you will start doing meshes and "tetra" which is a tetrahedron. <i think that's how you spell it. i'm willing to explain meshes but it's much more coplicated and would be easier to explain on IM.
if you have any more questions my email is dirtbikerdude_91@yahoo.com
i'm happy to answer any questions that i am capable of answering.

Quite a big post lol Helpful no doubt, but I don't think anything you wrote hasn't already been written in any of the other posts or links above
You should put this somewhere so it doesn't just get left and eventually lost in the forums.
My 2 cents is to learn to hand code. It's quite handy, annoying at times. You should really give Blender and Wings a go though too!
You should put this somewhere so it doesn't just get left and eventually lost in the forums.
My 2 cents is to learn to hand code. It's quite handy, annoying at times. You should really give Blender and Wings a go though too!


-
Spazzy McGee
- Sergeant Major
- Posts: 1405
- Joined: Mon Mar 21, 2005 4:59 pm
- Location: Planet MoFo, Sheffield Division; United Kingdom
Whoa, don't put him down GraceF, that's a post of epic proportions.
I think, after a spelling cleanup, that deservers to stikified in it's own thread.
I think, after a spelling cleanup, that deservers to stikified in it's own thread.
Last edited by Spazzy McGee on Wed Jun 27, 2007 1:10 pm, edited 1 time in total.
"Life is what happens to you while you're busy making other plans." - John Lennon
-
Longhair
- Private First Class
- Posts: 330
- Joined: Tue Feb 08, 2005 6:06 pm
- Location: Lancaster, PA
- Contact:
Yes, that post, with some cleanup, should end up in a wiki.
I also agree with Grace F's attitude about learning to hand code. It's sorta like the web designers that I always end up working with who have maybe seen HTML, but don't really know how it works. They're just crippled in a certain way because they can't hand code.
On the other hand, good luck making leaves with hand coding...
Maybe i should put it on a wiki. Should i put it here
http://my.bzflag.org/w/Category:Map_Making
with the "editing by hand" title? I checked the spelling
http://my.bzflag.org/w/Category:Map_Making
with the "editing by hand" title? I checked the spelling
-
Spazzy McGee
- Sergeant Major
- Posts: 1405
- Joined: Mon Mar 21, 2005 4:59 pm
- Location: Planet MoFo, Sheffield Division; United Kingdom
Start a new page, call it "Editing by hand" then add it to the Map Making category.
You may find this useful: http://www.bbcode-to-html.com/
My advice is to post it as an HTML page first, then somebody else can come along and replace it all with proper wiki syntax.
The beauty of the wiki is that others can come and correct or re-order your material to make it the best it can be.
You may find this useful: http://www.bbcode-to-html.com/
My advice is to post it as an HTML page first, then somebody else can come along and replace it all with proper wiki syntax.
The beauty of the wiki is that others can come and correct or re-order your material to make it the best it can be.
"Life is what happens to you while you're busy making other plans." - John Lennon
-
Lt-Kirby2007
- Private First Class
- Posts: 76
- Joined: Tue May 15, 2007 7:53 pm
- Location: England, Uk

